Следвайте инструкциите за монтаж стъпка по стъпка, или пуснете видеото за да видите инсталационния процес.
Инсталирайте термостатен<br/>смесител за вана/душ
Подкотовка
![](http://cdn.cloud.grohe.com/Web/local_assets_4_3/service/fr_fr/03__install_thm_bath/4_3/960/03__install_thm_bath_4_3.jpg)
Ако правите голям ремонт, водната мрежа трябва да бъде прочистена от всякакви замърсявания, за да избегнете повреди по смесителя.
![](http://cdn.cloud.grohe.com/Web/local_assets_4_3/service/fr_fr/install-thermostatic-bath-mixer-3_4_3/4_3/960/install-thermostatic-bath-mixer-3_4_3_4_3.jpg)
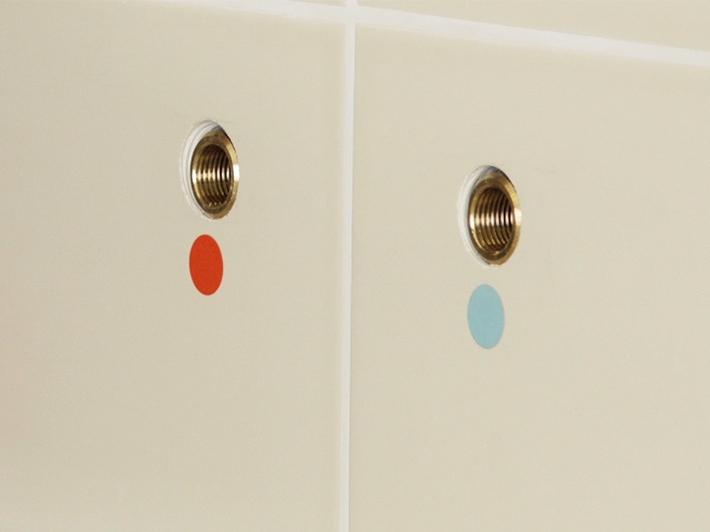
Преди да свалите стария си смесител, се уверете, че топлата вода е отляво, а студената- отдясно. Повикайте професионалист, ако това не е така.
![](http://cdn.cloud.grohe.com/Web/local_assets_4_3/service/fr_fr/install-thermostatic-bath-mixer-4_4_3/4_3/960/install-thermostatic-bath-mixer-4_4_3_4_3.jpg)
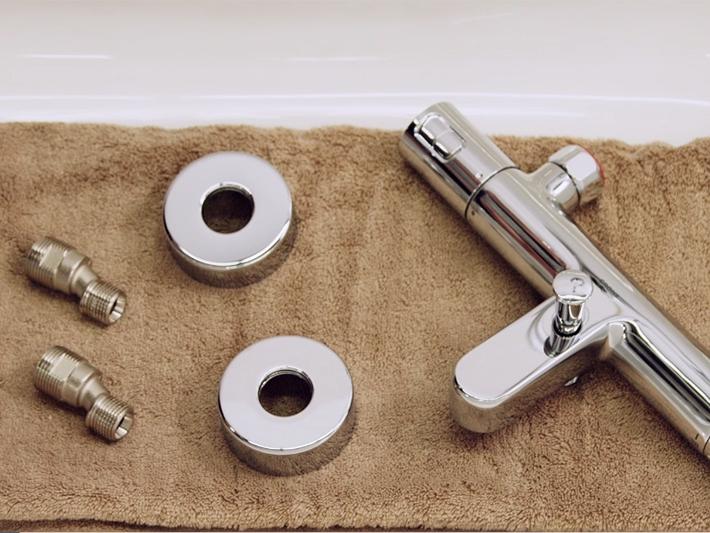
Подгответе нужните части и инстументи.
Спрете водоснабдяването преди да свалите смесителя.
Подготовка
![](http://cdn.cloud.grohe.com/Web/local_assets_4_3/service/fr_fr/install-thermostatic-bath-mixer-5_4_3/4_3/960/install-thermostatic-bath-mixer-5_4_3_4_3.jpg)
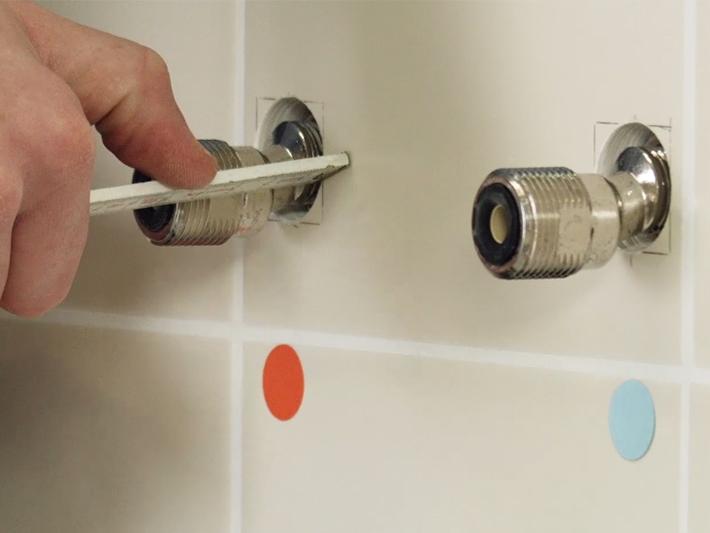
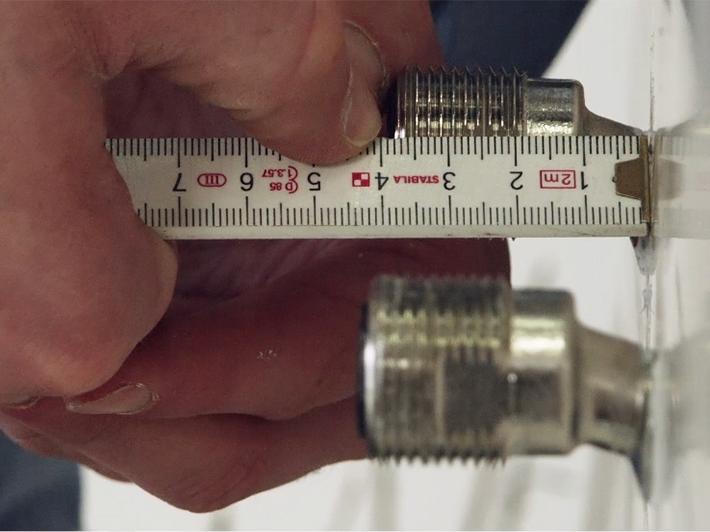
1 - Screw the s union connectors in to your fittings in the wall so that they extend by about 42 mm.
![](http://cdn.cloud.grohe.com/Web/local_assets_4_3/service/fr_fr/install-thermostatic-bath-mixer-6_4_3/4_3/960/install-thermostatic-bath-mixer-6_4_3_4_3.jpg)
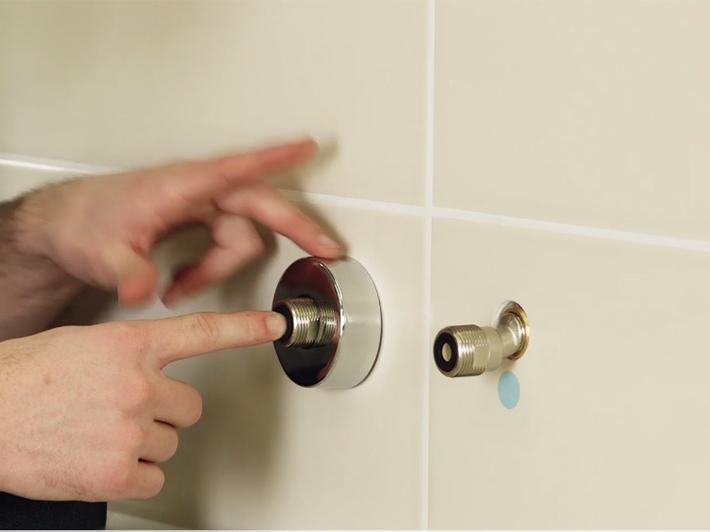
2 - Монтирайте розетките към стената.
![](http://cdn.cloud.grohe.com/Web/local_assets_4_3/service/fr_fr/install-thermostatic-bath-mixer-7_4_3/4_3/960/install-thermostatic-bath-mixer-7_4_3_4_3.jpg)
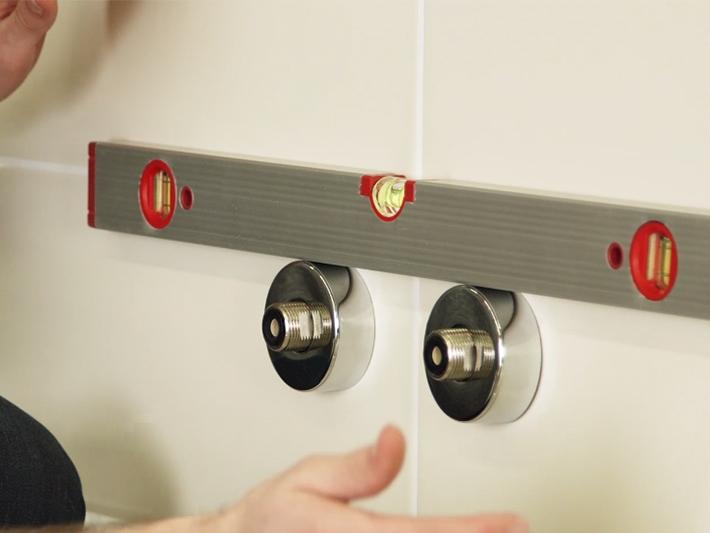
3 - Adjust the spacing so that there is 150 mm between the centres of the escutcheons, and then verify they are level . Adjust if necessary.
![](http://cdn.cloud.grohe.com/Web/local_assets_4_3/service/fr_fr/install-thermostatic-bath-mixer-8_4_3/4_3/960/install-thermostatic-bath-mixer-8_4_3_4_3.jpg)
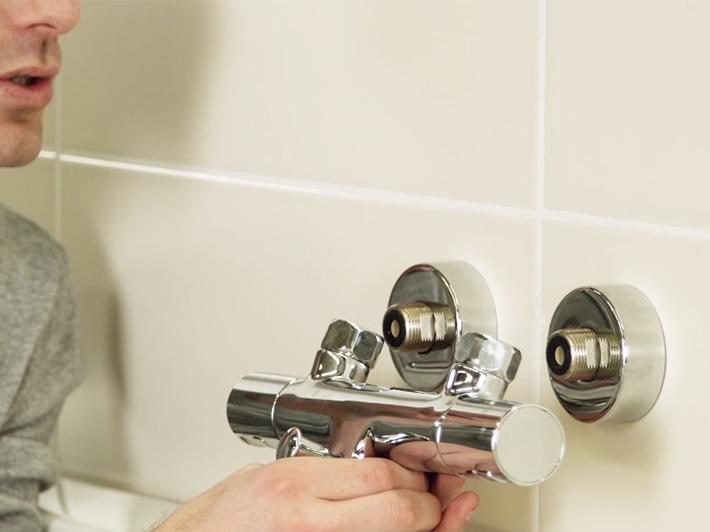
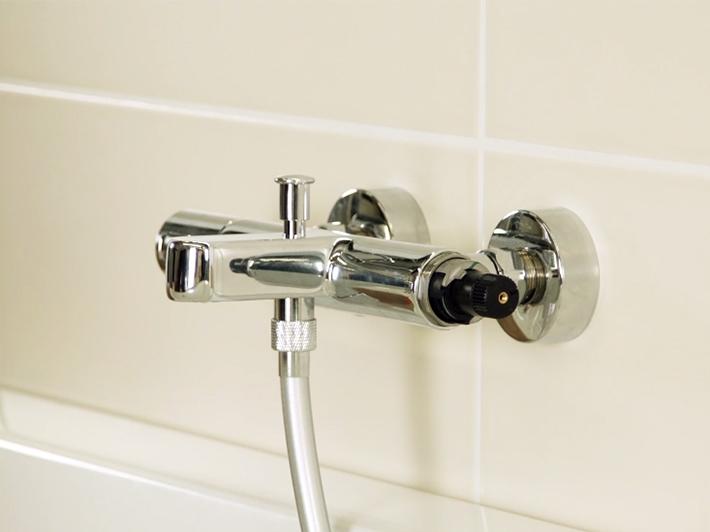
4 - Install the mixer and tighten firmly. The nuts must not touch the escutcheons. Adjust if necessary and verify horizontal positioning.
![](http://cdn.cloud.grohe.com/Web/local_assets_4_3/service/fr_fr/install-thermostatic-bath-mixer-9_4_3/4_3/960/install-thermostatic-bath-mixer-9_4_3_4_3.jpg)
5 - Remove the assembly. Note the depth between the s union connectors and the wall.
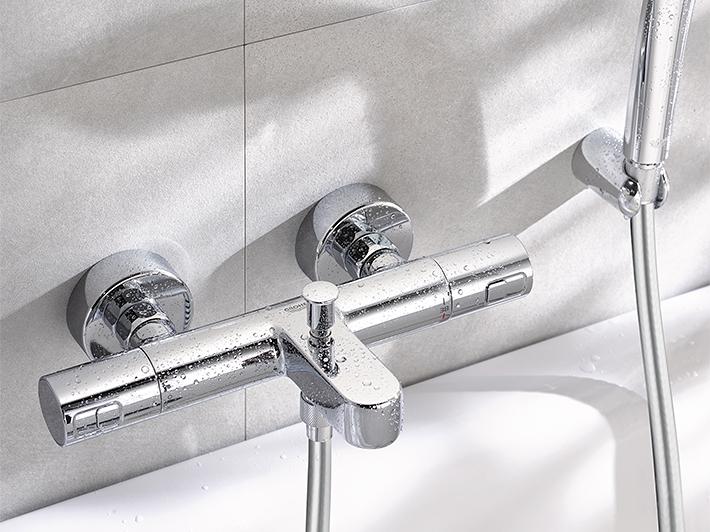
Инсталиране на термостетния смесител
![](http://cdn.cloud.grohe.com/Web/local_assets_4_3/service/fr_fr/install-thermostatic-bath-mixer-10_4_3/4_3/960/install-thermostatic-bath-mixer-10_4_3_4_3.jpg)
1 - Seal the thread of the s union connector using PTFE tape, wrapped in the tightening direction.
![](http://cdn.cloud.grohe.com/Web/local_assets_4_3/service/fr_fr/install-thermostatic-bath-mixer-11_4_3/4_3/960/install-thermostatic-bath-mixer-11_4_3_4_3.jpg)
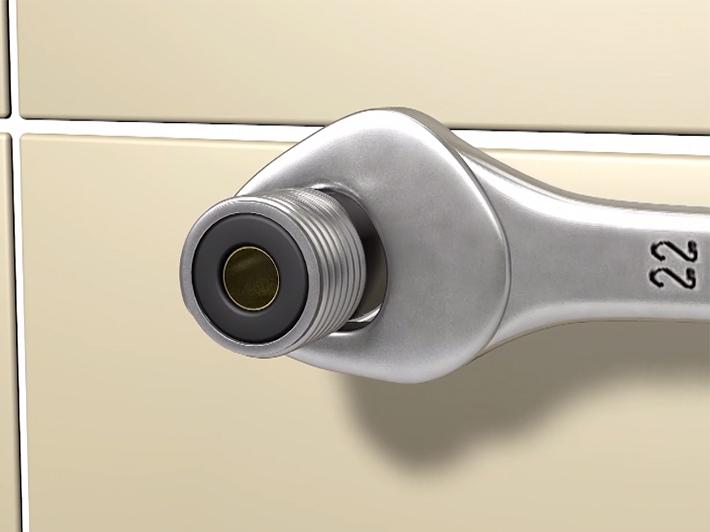
2 - Tighten the s union connectors with a 22 mm open-end wrench.
![](http://cdn.cloud.grohe.com/Web/local_assets_4_3/service/fr_fr/install-thermostatic-bath-mixer-12_4_3/4_3/960/install-thermostatic-bath-mixer-12_4_3_4_3.jpg)
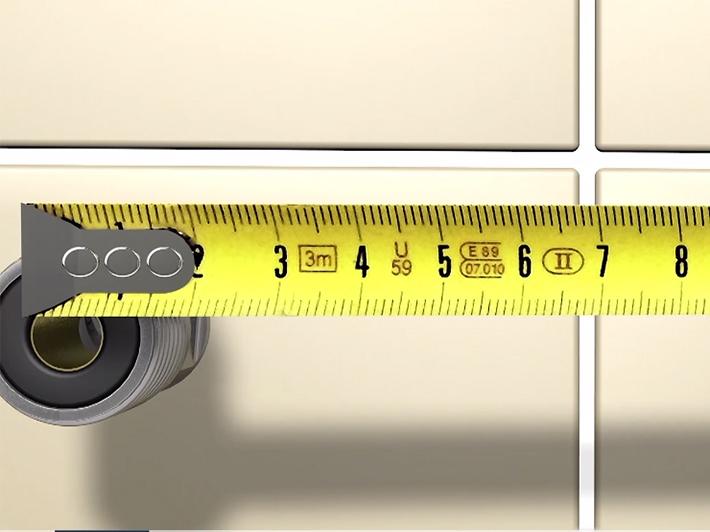
3 - Adjust the connectors so that there is a space of 150 mm centre to centre, and the same depth, as noted from your previous measurements. Then check They are level using a spirit level.
![](http://cdn.cloud.grohe.com/Web/local_assets_4_3/service/fr_fr/install-thermostatic-bath-mixer-13_4_3/4_3/960/install-thermostatic-bath-mixer-13_4_3_4_3.jpg)
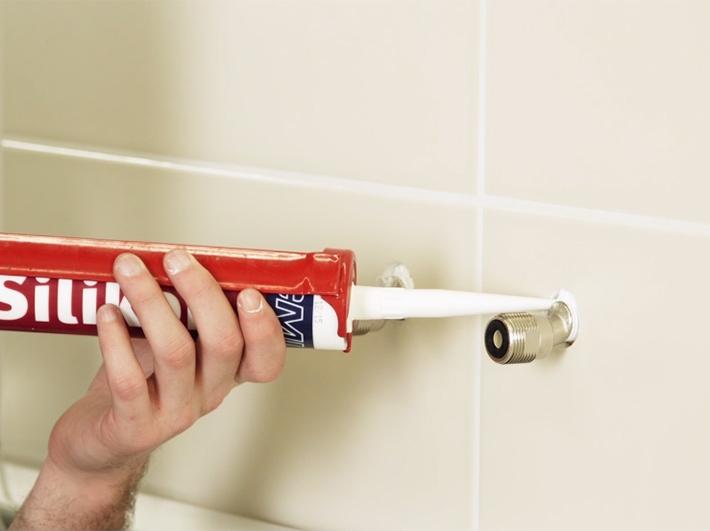
4 - Apply a silicon seal between the wall and the eccentric connectors.
![](http://cdn.cloud.grohe.com/Web/local_assets_4_3/service/fr_fr/install-thermostatic-bath-mixer-14_4_3/4_3/960/install-thermostatic-bath-mixer-14_4_3_4_3.jpg)
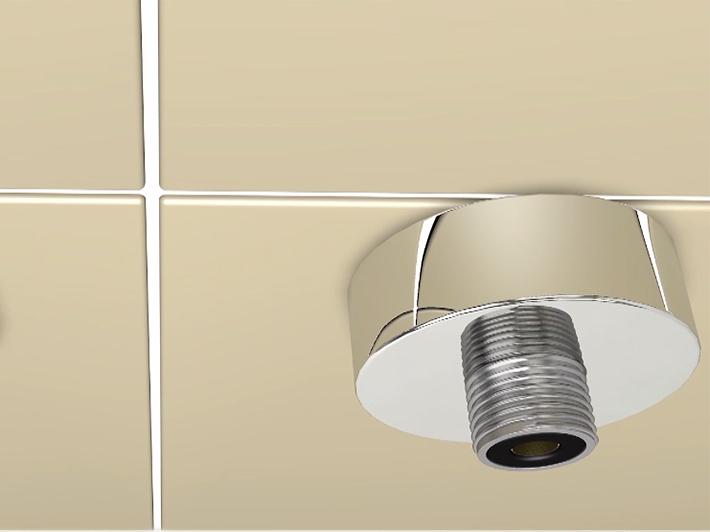
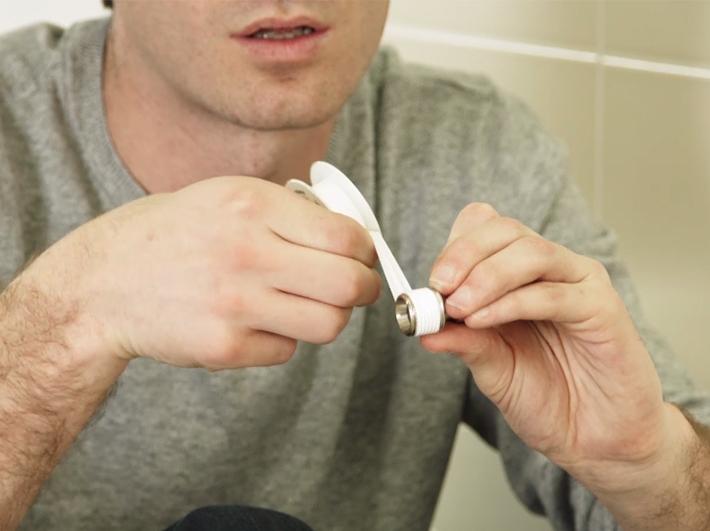
5 - Screw the escutcheons onto the s union connectors.
![](http://cdn.cloud.grohe.com/Web/local_assets_4_3/service/fr_fr/install-thermostatic-bath-mixer-15_4_3/4_3/960/install-thermostatic-bath-mixer-15_4_3_4_3.jpg)
6 - Then remove the red and blue caps from the mixer. Make sure the filters are placed correctly, with the rounded side facing inwards.
![](http://cdn.cloud.grohe.com/Web/local_assets_4_3/service/fr_fr/install-thermostatic-bath-mixer-16_4_3/4_3/960/install-thermostatic-bath-mixer-16_4_3_4_3.jpg)
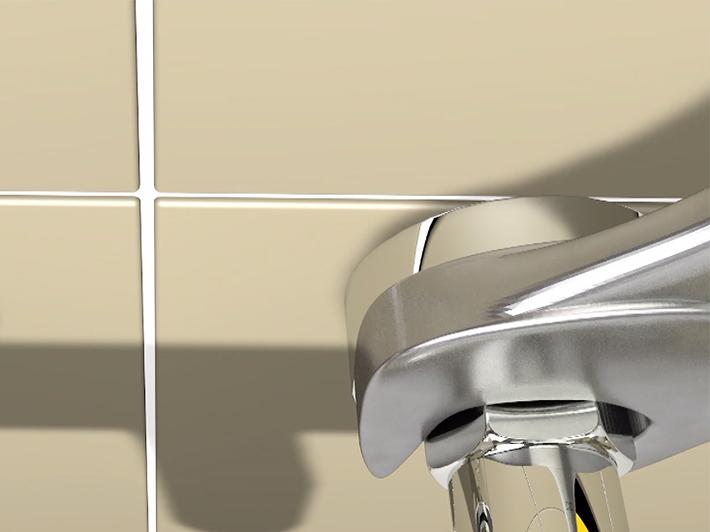
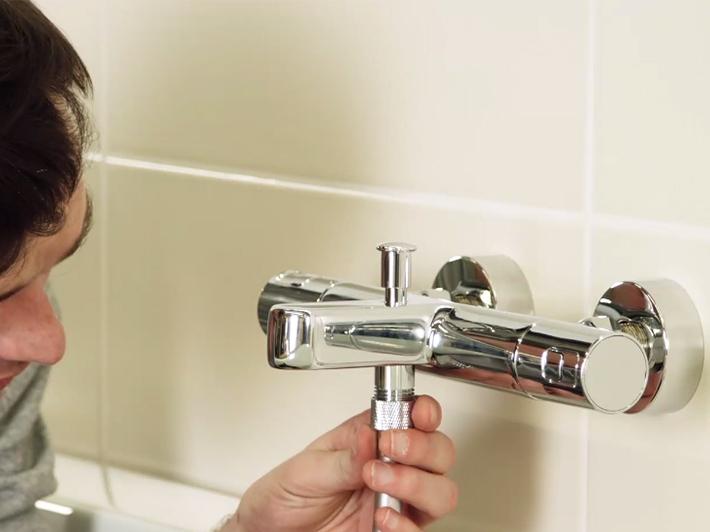
7 - Place the mixer on the s union connectors, without adding any additional seals, then tighten the nuts using a 32 mm open-end wrench.
![](http://cdn.cloud.grohe.com/Web/local_assets_4_3/service/fr_fr/install-thermostatic-bath-mixer-17_4_3/4_3/960/install-thermostatic-bath-mixer-17_4_3_4_3.jpg)
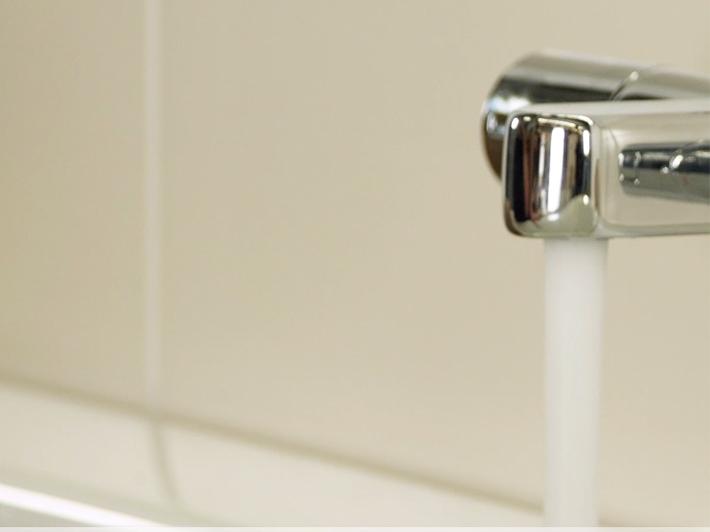
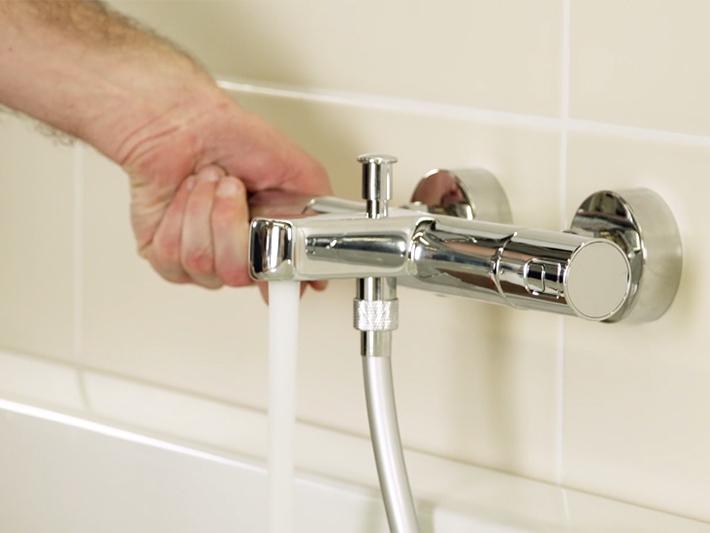
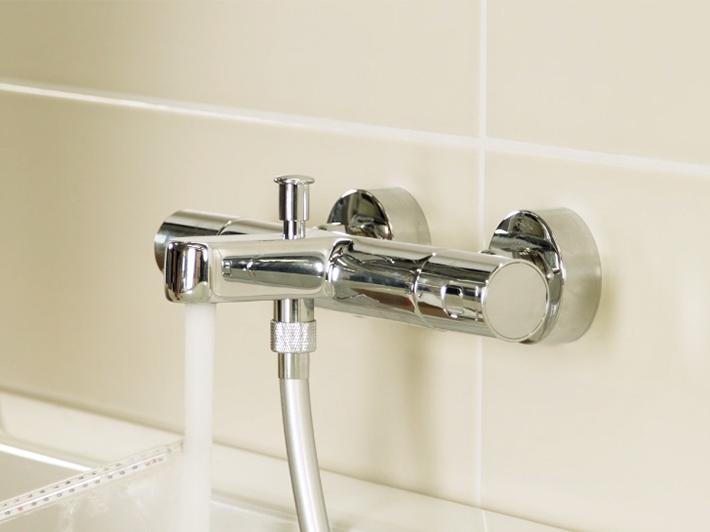
8 - Използвайте нивелир, за да се уверите, че смесителят е равен. Регулирайте го, ако е необходимо. Проверете за течове, като пуснете водното снабдяване към смесителя.
Свържете шлауха
![](http://cdn.cloud.grohe.com/Web/local_assets_4_3/service/fr_fr/install-thermostatic-bath-mixer-18_4_3/4_3/960/install-thermostatic-bath-mixer-18_4_3_4_3.jpg)
Уверете се, че уплътнението в шлауха е на правилното място и завинтете края към смесителя.
![](http://cdn.cloud.grohe.com/Web/local_assets_4_3/service/fr_fr/install-thermostatic-bath-mixer-19_4_3/4_3/960/install-thermostatic-bath-mixer-19_4_3_4_3.jpg)
Pull the bath/shower diverter knob to use the hand shower.
![](http://cdn.cloud.grohe.com/Web/local_assets_4_3/service/fr_fr/install-thermostatic-bath-mixer-20_4_3/4_3/960/install-thermostatic-bath-mixer-20_4_3_4_3.jpg)
Сега се уверете, че термостатния смесител работи правилно.
Настройте термостатния смесител
![](http://cdn.cloud.grohe.com/Web/local_assets_4_3/service/fr_fr/install-thermostatic-bath-mixer-21_4_3/4_3/960/install-thermostatic-bath-mixer-21_4_3_4_3.jpg)
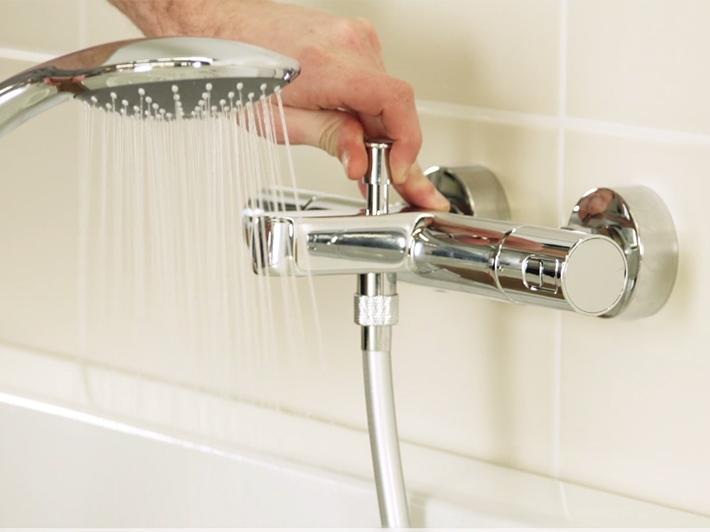
1 - С помощта на термометър проверете температурата на водата. Ако тя е 38°C, когато показателя на ръкохватката съвпада с показателя за 38°C върху тялото, не е необходима допълнителна настройка.
![](http://cdn.cloud.grohe.com/Web/local_assets_4_3/service/fr_fr/install-thermostatic-bath-mixer-22_4_3/4_3/960/install-thermostatic-bath-mixer-22_4_3_4_3.jpg)
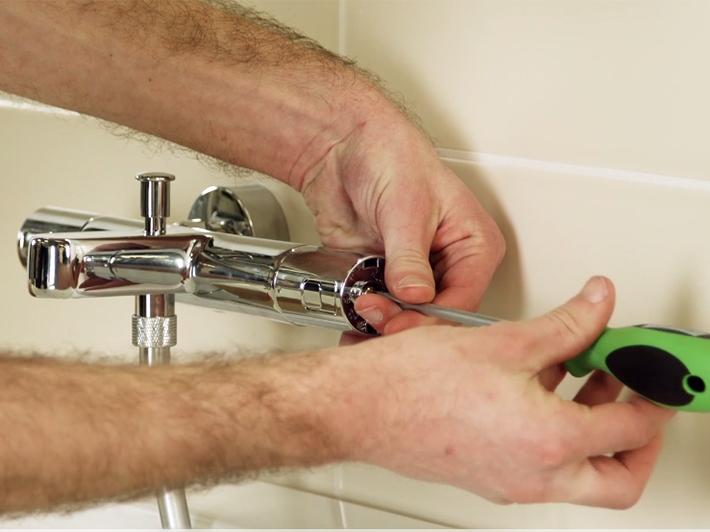
2 - Ако е необходимо калибриране запушете отвора за сифона и свалете ръкохватката, използвайки малка плоска отвертка.
small flat-head screwdriver.
![](http://cdn.cloud.grohe.com/Web/local_assets_4_3/service/fr_fr/install-thermostatic-bath-mixer-23_4_3/4_3/960/install-thermostatic-bath-mixer-23_4_3_4_3.jpg)
3 - Разхлабете винта, след което отстранете ръкохватката.
![](http://cdn.cloud.grohe.com/Web/local_assets_4_3/service/fr_fr/install-thermostatic-bath-mixer-24_4_3/4_3/960/install-thermostatic-bath-mixer-24_4_3_4_3.jpg)
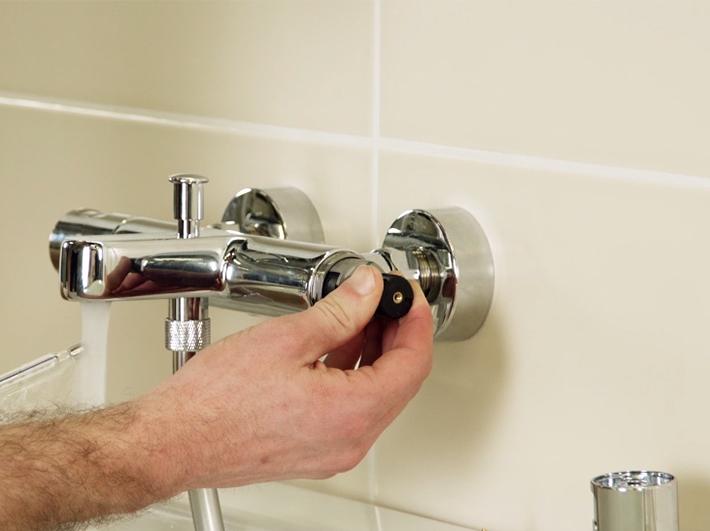
4 - Пуснете водата. Настройте термостатния картуш, чрез завъртане на назъбения черен елемент, докато температурата не достигне 38°C.
Поставете обратно ръкохватката, така че да показва 38°C. Закрепете ръкохватката с винтовете и сложете
Put the handle back with the guide on the handle facing 38°C. Screw in the handle and put the cover back on.
![](http://cdn.cloud.grohe.com/Web/local_assets_4_3/service/fr_fr/final_4_3/4_3/960/final_4_3_4_3.jpg)
Поздравления, готови сте с монтажа на новия си продукт GROHE. Проверете и другите инструкции за инсталация и разгледайте всички наши продукти на grohe.bg